DIY Painted Acorns & Acorn Necklace Tutorial

It’s officially FALL! Here’s a cute and easy fall craft you can do with ACORNS – assuming the squirrels haven’t gotten to them all first.

Acorns are popular symbols in jewelry and keepsakes, as well as in folklore and magick.

  • Acorns are an old symbol of good luck, strength, and prosperity.
  • Carrying an acorn in your pocket is said to protect you from illnesses.
  • Placing an acorn on your windowsill under a full moon is said to bring you good fortune.
  • “Passing the acorn” is an ancient pagan practice of gifting an acorn to a fellow witch at Samhain.
  • The red tannins from the water of soaked acorns can be used as a dye. Tannin-water from soaked acorns is also anti-septic, anti-viral, and will help with minor burns, rashes, and poison ivy.

Because it’s fall, and nearly Samhain, I wanted to preserve some acorns and place them on our family altar and make a necklace for K and myself to wear! Fortunatley, we live in an area of the country where several types of oak trees are abundant – and the acorns have just recently begun to fall. Preserving the acorns for our decor was super easy, and the necklaces turned out really cute! Here’s how:

First, collect some acorns – obviously 😉 If acorns are not available where you live, you can get them from Amazon! Make sure they do not have any holes or visible rot/mold. It’s OK if the caps come off, you can glue them back on. Just make sure you have a cap for every acorn!

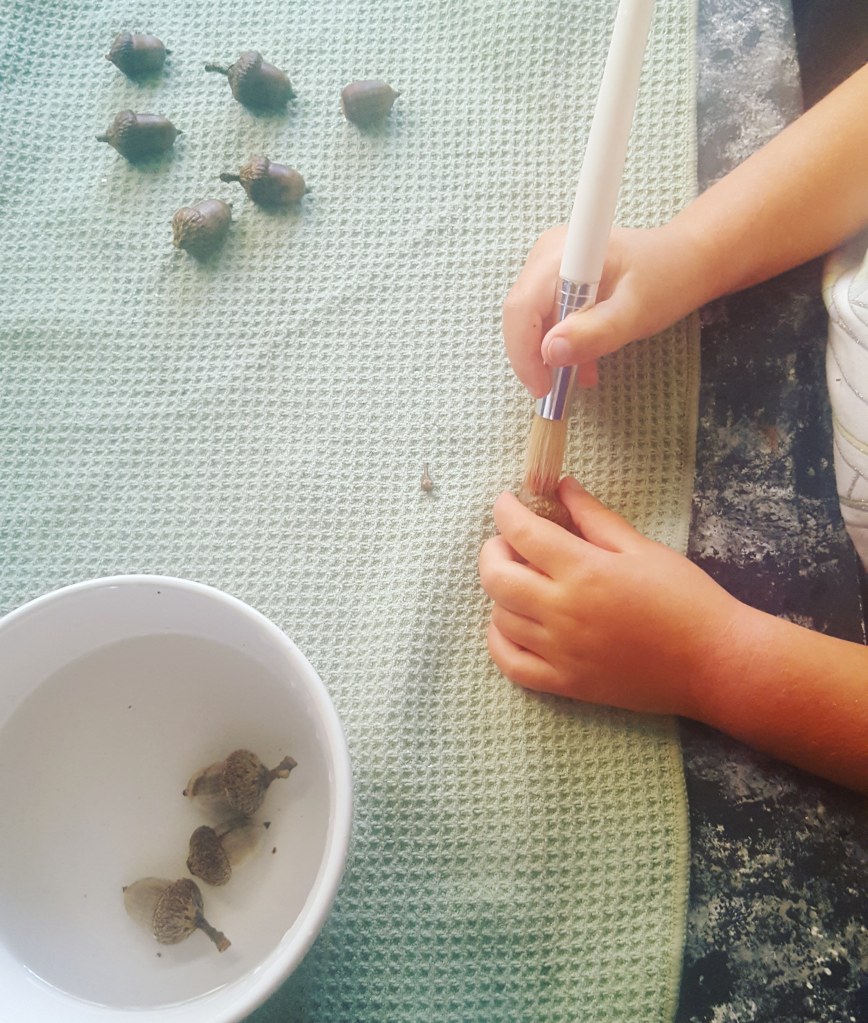
Rinse the acorns in water and gently brush over each one with a bristly paintbrush, toothbrush, or other soft bristled brush.

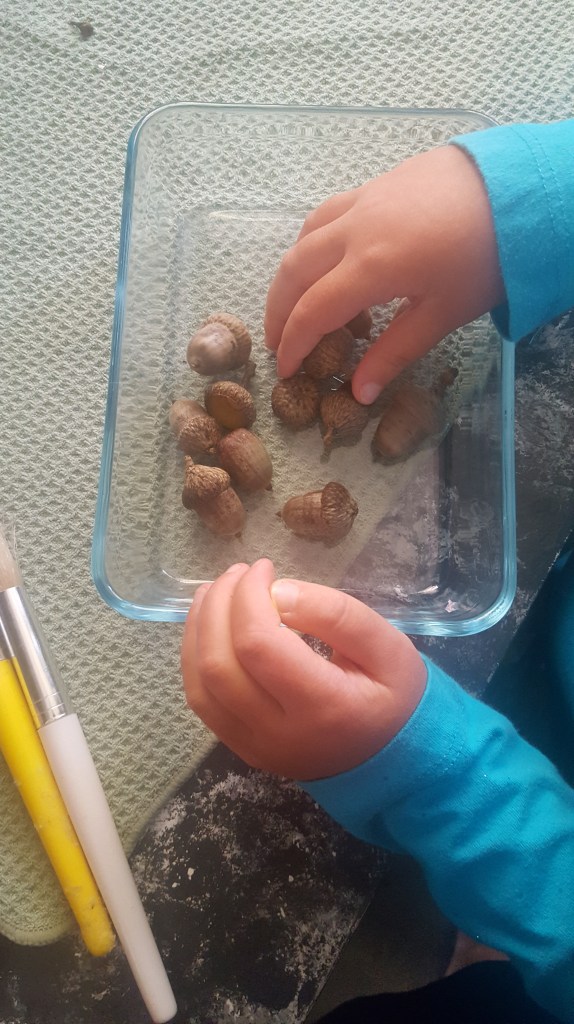
Set them on a flat surface to air dry for 1 hour. Then place the acorns (and caps) in a shallow baking dish and place into an oven set to 175F. Allow to remain in the oven for 2 hours, rotating the acorns every 30 minutes. Remove from oven and allow to cool completely.

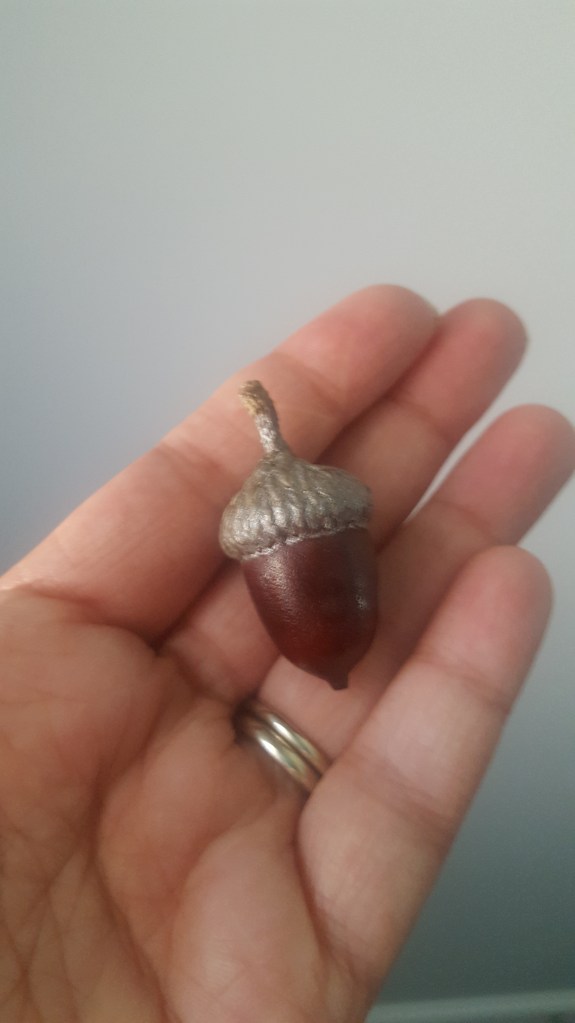
Once they have cooled you can leave them as is, or you can place a shiny clear coat over them, or you can paint them! I recommend using enamel or acrylics if you choose to pain them.

If you want to make your own acorn necklace, you’ll need:

  • a needle
  • an eye pin (or jewelry wire to make an eye pin)
  • a chain with a clasp, leather cording, or whatever you want to string the acorn on to make the necklace.
  • an extra o-ring
  • an acorn, prepared as above. It’s actually easiest if you chose one that has been separated from it’s cap – though you’ll still need the cap!
  • hot glue gun

Instructions:

  1. Insert the needle straight down into the cap where you want the eye pin to go. Be careful not to put too much pressure on the acorn cap so it doesn’t crumble or crack. Wiggle the needle around to enlarge the hole a bit then insert the eye pin, loop side out.
  2. Trim the eye pin so there is only a little bit inside the acorn (about 3-5mm). Bend this part of the eye pin so it doesn’t pull straight out of the cap.
  3. Fill the acorn cap with hot glue and quickly press the acorn body into the cap. Hold pressure until set.
  4. Place the o-ring through the eye pin and close securely.
  5. You now have an acorn charm that you can place on your necklace chain, cord, or string!

We tried making the charm with 2 holes in the cap at first, but it was very difficult to pass the eye pin through both holes. The second charm we made, I used the method above and it worked wonderfully!

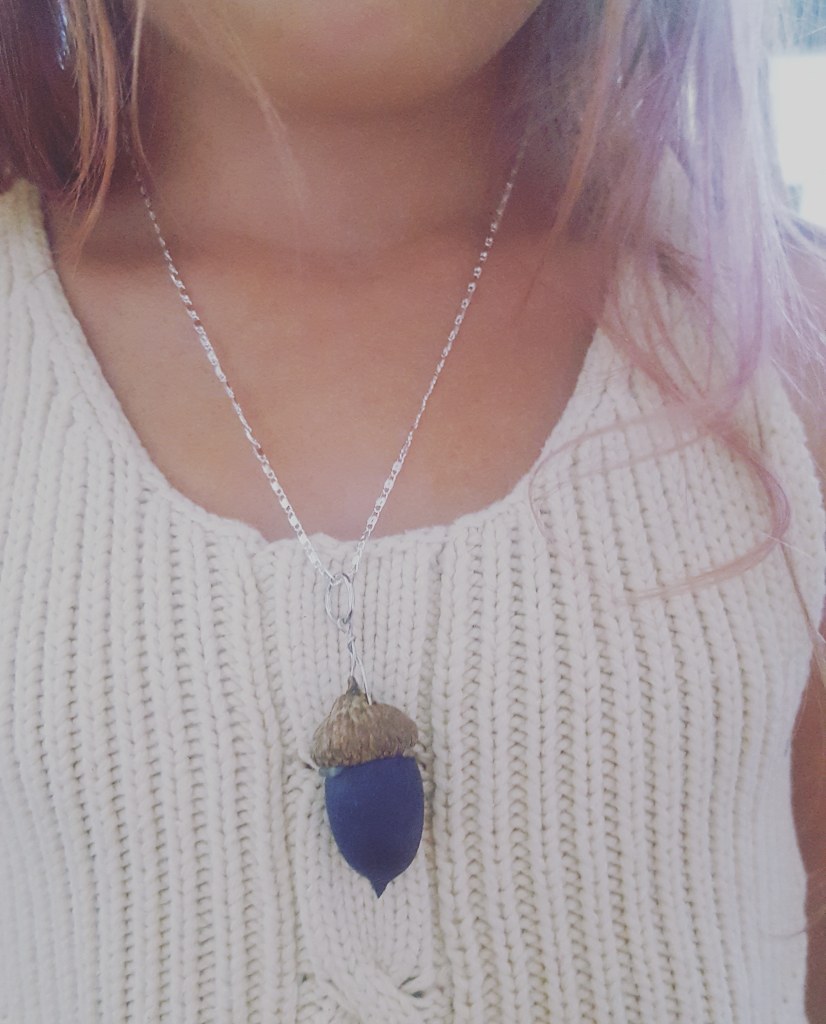
A note of caution, make sure if you paint the acorns that they are good and dry before you wear them as a necklace!! I’d even advise putting a clear coat over the paint so it doesn’t rub off on clothing. My little one treated her acorn as a chewie necklace shortly after we made hers and it resulted in a blue face and stained shirt! (c’est la vie)

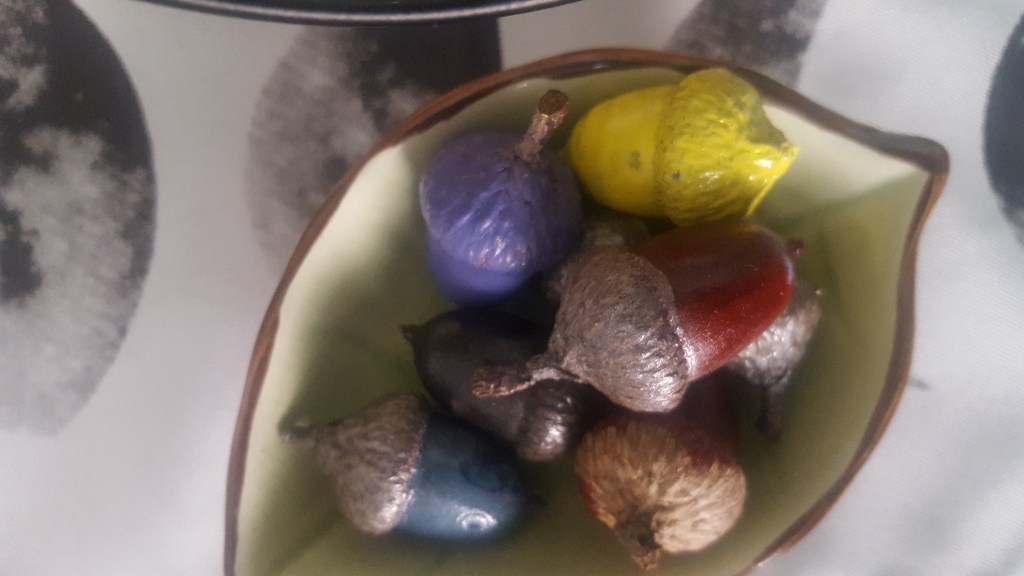
The rest of our acorns are resting in this adorable leaf bowl on our altar!

I’m slightly addicted to colorful acorns now and I imagine we will make this a yearly seasonal tradition! Waxed pinecones are next 😉

For more acorn and fall craft ideas – follow us on Pinterest!

Easy Fall Leaf Print Art Project

Easy Fall Leaf Print Art Project

What’s a better way to learn about different trees / leaf patterns than this esay leaf print project?

All you need are leaves of various shapes and sizes, acrylic or tempura paunts, brushes, and a printable surface (we chose a small canvas, but you could also use t-shirts or tote bags!).

We gathered our leaves from our backyard, but you could gather them really anywhere during the fall! Special places or on a nature walk… Try gathering both deciduous and coniferous leaves! Just make sure you choose leaves that arent too brittle or they will break and crumble when you try to press them down.

Once you have your leaves, evenly paint the underneath side of the leaf to get all the vein patterns. You want a thin wet coat, no glops or it won’t show the print very well.

Position your leaf painted side down and lightly press/rub from the stem outward towards the tips, being caregul not to scoot the leaf across the surface of the canvas (or t-shirt, paper, etc.)

Then, gently peel the leaf upward from its stem and voila! You should have a leaf print!

Try painting patterns or multiple colors on a single leaf for more artsy prints. Also, don’t be afraid to let the prints overlap!

Experiment and have fun. Try to identify the trees each leaf came from, talk about the differences you see in the leaf patterns, etc.

Once we were done with our leaves, we let the re-painted and let the leaves dry, then ran them through oyr laminator. We cut out around their shapes and, with the help of Facebook and Google, identified each leaf’s tree and wrote its name on the unpainted side in Sharpie for my daughter’s nature collection (and educational purposes)!

DIY Eco-Friendly Bird Feeders

For one of our Summer Solstice activities, we made these easy, eco-friendly, bird feeders! They are eco friendly because every part of the feeder is bio-degradable/natural!

This craft takes literally minutes to do, making it a perfect activity for those who have little time or small attention spans!! (ahem, my child.) If you’re going to let little ones do the cutting (hello fine motor skills!), you should definitely use a kid’s safety knife. We have this set and LOVE it!

SENSORY TIP: For avoiders, have baby wipes handy or have them wear gloves, as this activity can be a bit sticky. I know my daughter HATES that sticky feeling!

What you’ll need:

  • Navel Oranges or Grapefruits (large fruits with thick skin work best!)
  • Wild Bird Seed
  • String made from natural fibers (yarn, twine, etc.)
  • Tools:
    • Small Knife (or kid’s safety knife)and Cutting Board/Mat
    • Bowl
    • Spoon
    • Scissors
    • Pencil/Screwdriver (something to poke holes with)
    • Ladder (to help you hang the finished feeders!)

Instructions:

  1. Cut each orange (or grapefruit) in half. Make your cut in the widest part of the orange, not from navel to navel.
  2. Using a small knife, cut around the flesh to loosen it from the pith and rind. Do this carefully so you don’t rip or puncture the rind. We need that part to be intact!
  3. Scoop out the flesh with a spoon and place in a bowl. Set aside for juicing, eating, or baking!
  4. Using a pencil or screwdriver, puncture two holes on either side of the hollowed out rind. Place these holes at least a half centimeter below the rim of the “bowl” you have created.
  5. Thread 1 string through each hole and tie securely to the orange rind.
  6. Fill the bowl with wild bird seed.
  7. Hang outside!

To extend this activity, you could use this as an opportunity to discuss the parts of an orange or how they are grown.

If you don’t want to eat or juice the orange pulp, try replacing all the wet ingredients in a yellow box cake mix with orange juice for a fresh summery take on cake! Or check out THESE other orange recipes.

Happy Summer-ing!
M

Our favorite products for kids with sensory needs

My 4 (going on 14… anyone else have one of those?) year old daughter, K, was diagnosed with sensory processing disorder a couple years ago. She’s had issues with her ears since birth and it’s suspected that her SPD is linked to that. She has a HUGE noise sensitivity as well as some vestibular and proprioceptive delays.

We’ve been through therapy, took a break, and are looking to get back to an OT soon.  K just started attending a local cottage school (where I teach) one day a week and could use the extra support.

Over time, we’ve accumulated several things at home to help support her sensory needs. Amazon is a FANTASTIC place to find toys and tools for SPD/ASD kiddos. Here are some of our favorites:

1) OUTREE Kids Pod Swing Seat Hammock


Swinging is one of the best activities for sensory input. (Check out these  benefits of a sensory swing). We purchased this one for K and hung it in her room. It can support up to 170lbs. Pro Tip: If you’re hanging this inside, don’t use the anchor that comes with the product – use a different heavy duty anchor. The anchor that came with the product failed and caused the swing to fall, but the anchor we replaced it with has held the swing up fine.

This swing can be used indoor or out and, other than the anchor design, is a good quality product. The exterior is a canvas material, which is suitable for outdoor weather. My girl loves curling up in this with her stuffed animals!

2) Vanderfields Earmuffs for Kids

Noise sensitivity is a common symptom of sensory processing disorder and ASD. My daughter is literally terrified of flushing toilets, hand dryers, blenders, the vacuum…pretty much anything with a small motor. Or a big motor. Okay, pretty much anything that makes loud mechanical sounds. And water.

Bathroom trips in public were a NIGHTMARE before we purchased these noise blocking ear muffs. She’d stick her fingers in her ears and refuse to move. It’s incredibly difficult to get a child to use the restroom when they won’t use their hands.

These noise blocking ear muffs have been a LIFE CHANGER. Public restroom visits are a breeze now. If I’m blending a smoothie or vacuuming, I just give her advance notice and she grabs her ear muffs. These travel with us everywhere. She even uses them at night sometimes when it storms, since she’s also bothered by thunder.

These come in 8 fun colors – I let K pick out which one she wanted. They are cushy on the ears and expand to fit even my adult sized head (I’ve used them while operating a table saw). These do NOT cancel ALL noise, but rather lower the noise level by about 20 decibels. (For reference, normal conversation is about 60 decibels, while many household tools hover around 80-85 decibels.)

3) SENSO MEGA BUNDLE Sensory Chew Necklace – Silicone Chewy


I’ve sometimes found K biting her hands or fingers – especially when she’s upset or tired. We got a chewy necklace like these, from a birthday party, and she wears it out when we’re going to do something that’s particularly demanding on her senses. However, it’s currently lost in the abyss so this multi pack is on our list for the next Amazon order!

These are silicone, so they are soft on the teeth and won’t cause any problems for those who are allergic to latex (me!). If your kiddo is a chewer or just likes the oral sensation, then these necklaces are a MUST!

4) MarvelBeads Water Beads Rainbow Mix – 8oz


If you’re like me and are sick of dealing with kinetic sand and sticky slime, then these are the perfect alternative for you and your kiddo! Mine spent a good hour (or more!) squishing these around, scooping them up, filling jars, etc. They can also be frozen for a totally different sensory experience. If you’ve got a kiddo that needs tactile input, I highly recommend trying these out.

5) Seamless Socks

I don’t know about your kiddo but socks used to be the biggest pain and would inevitably cause a meltdown. That little line on the toes annoys me at times, I can only imagine how irritating it is to my hypersensitive sensory avoider. We started turning her socks inside out, but sometimes that still bothers her. These seamless socks are on our wish list right now! I love them because they are cute animal characters – which my girl LOVES. Her favorite pair of socks right now are a pair that, when you put your feet together, make an owl face. I’m thinking these will be a stocking stuffer for Christmas this year!


Do you have any products you have found that have helped your kiddo and supported their needs? I’d love to hear about them! Please share in a comment. 🙂

xo,
Marissa