Instant Pot Sweet n’ Smoky BBQ Meatballs

I don’t often follow a pre-made recipe. In fact I’d say that unless I’m baking something, I basically never follow a formal recipe. Recipes are like jumping off points, inspirational guidelines, if you will.

I say this because you’ve probably seen a recipe or two already that calls for grape jelly to make those slow cooker party meatballs or lil’ smokies sausages. The recipe below also calls for grape jelly, so you might think this recipe is just more of the same that you’ve seen before. But you’d be wrong my friend.

Most of those recipes call for frozen pre-made meatballs. We’re not going to do that. Oh no. We’re going to whip up a batch of homemade meatballs and it’s going to be so easy and tasty you’re going to wonder why you ever bought those frozen ones.

(Of course, no judgement if you DO want to use frozen meatballs. You do you, boo.)

NOTE: YOU WILL NEED A FOOD PROCESSOR FOR THIS RECIPE!
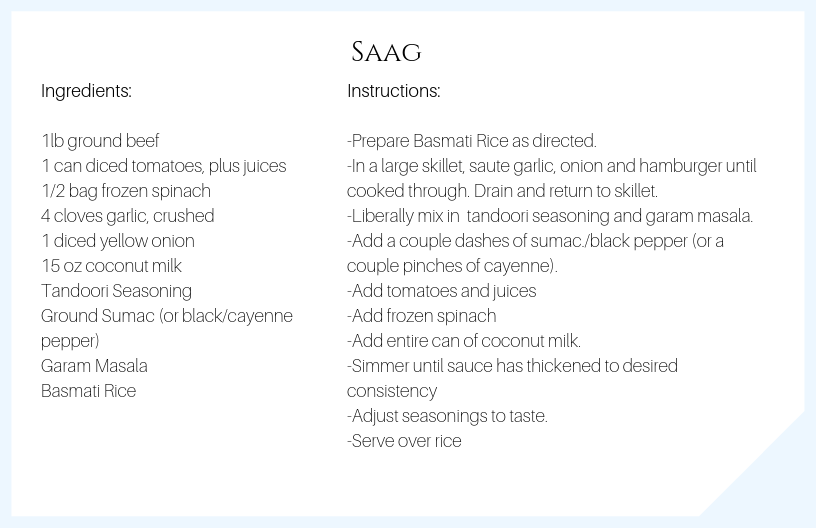
ingredients:

  • 1/2lb ground hamburger
  • 1/2lb ground country style sausage (not italian!)
  • 4 slices maple or hickory bacon
  • 1-2 eggs
  • 1 jar grape jelly
  • 1-2 bottles bbq sauce (I recommend something like Sweet Baby Ray’s in an original or hickory flavor.)
  • Cardamom (about 1-2tsps)
  • Ginger (about 1-2tsps)
  • Ground Sage (1/2 TBSP plus 1/2 TBSP)
  • 1tsp Salt
  • 1tsp Black Pepper
  • 2TBSP Oil
  • 1/2 cup water.

directions:

Step 1: Prepare the meatball mixture

In a food processor, add all meats, 1 egg, cardamom, ginger, 1/2TBSP sage, salt, and black pepper. Pulse until everything is well mixed. If the mixture does not combine well enough (should be easy to scoop and roll into ball shape), add the second egg and re-mix.

Note: Go light on the cardamom, you can always add more into the sauce if you feel it’s needed. Too much cardamom can be overpowering.

Step 2: Shape meatballs and brown

Using a soup spoon, scoop mixture and shape into roughly 1 inch balls. (If you make them too big, they will need to cook longer in the IP). Heat oil in a skillet and brown meatballs, gently turning so they don’t fall apart. You do not need to cook them all the way through! Browning helps them retain some shape and keeps them from sticking together in the IP. (You can skip this step if you’re short on time. I’ve done this recipe both ways and they’ve turned out fine without pre-browning.)

Step 3: Pressure Cook

Place meatballs in IP. Add 1/2 cup water to bottom.Add in 1/2TBSP ground sage. Pour bbq sauce over meatballs. Scoop out grape jelly on the very top. DO NOT STIR/MIX!!!!
Cook on high pressure for 10 minutes. Allow to naturally vent for 5 minutes, then quick release the pressure.

Step 4: Thicken sauce

You MAY need to thicken the sauce if it is too thin for your liking. You can do this by removing the meatballs, and placing the IP on sauté. Allow sauce to boil in IP with the lid OFF until it thickens to your liking. For a faster method and creating a super thick sauce, remove meatballs, place IP on sauté and add a bit of dissolved cornstarch 1TBSP at a time. Stir constantly until sauce reaches desired thickness.
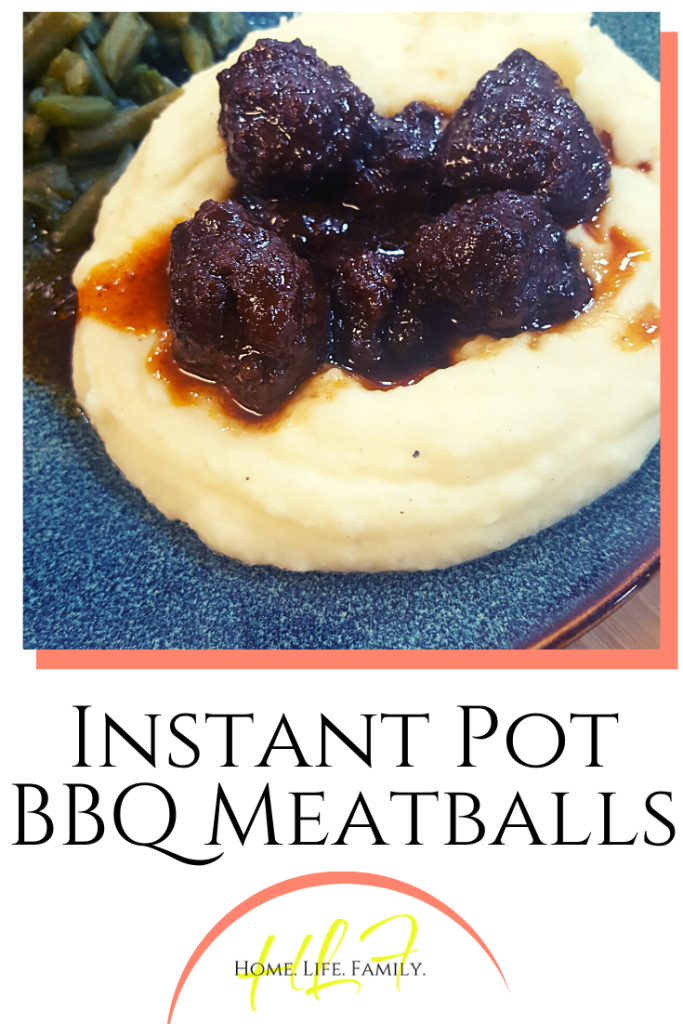
Step 5: Serve

Return meatballs to IP to coat in sauce. Add salt/pepper/spices to taste. Serve hot over homemade mashed potatoes, pasta, or rice!

Chicken Piccata

If you’re craving some Italian cuisine, but sick of the usual meals with tomato based sauces, then this recipe is for you! Chicken is lightly dredged in cornstarch, browned, and combined with a rich sour cream based sauce. It’s decadent and filling and is sure become one of your family’s favorites!

Ingredients:

  • 2-3 Chicken breasts
  • 16 oz sour cream
  • 2 eggs
  • Shredded Italian Cheese Blend/Mozzarella
  • Cornstarch
  • Lemon Juice
  • Minced Garlic
  • Capers
  • Garlic Powder
  • Ground Sage
  • Salt
  • Black Pepper
  • Dried Basil Flakes
  • Almond Milk (or milk of choice)
  • Butter or Olive Oil
  • Pasta (or ZOODLES!)

DIRECTIONS:

Step 1: Slice chicken into thin strips

Step 2: Dredge chicken in egg/cornstarch

Step 3: Working in small batches, add 1TBSP butter/oilto a skillet and cook dredged chicken until browned and cooked through. Season liberally with salt, pepper, garlic powder, and ground sage.

Step 4: While the chicken is cooking, prepare pasta or zoodles.

Step 5: Combine sour cream and 2 TBSPS butter/oil in a medium saucepan over medium heat, stirring to incorporate. Add lemon juice 1 tablespoon at a time to taste (I like mine fairly lemony!). Add 2TBSPS minced garlic, and 1-2 TBSPS capers. Season with salt, black pepper, and basil flakes to taste. Add almond milk (or mild of choice) to thin sauce to desired consistency. If the sauce is TOO thin, add shredded cheese to thicken.

Step 6: Assemble pasta/zoodles in bowl, top with chicken, sauce, and cheese. Sprinkle additional basil/pepper over top. Serve with lemon wedges.

If you aren’t using zoodles (or even if you are) you could easily add some veggies to this, and I often do! My favorite vegetable add ins are :

  • peas
  • roasted broccoli
  • roasted red peppers
  • grilled/sautéed yellow squash/zucchini

You could also serve this over wild rice – this is a very versatile recipe!

Enjoy!
Riss

Cheesy Pepperoni Pizza Chicken

I love making this cheesy pepperoni pizza chicken for dinner! It’s a little more prep work, but results in a delicious chicken recipe that kids and adults will love. The key to this recipe is using plenty of garlic powder and Italian seasoning, and searing the chicken before finishing the dish off in the oven.

To make this you’ll need….

Ingredients

Fresh chicken breasts (as many as you want to make)

Pepperoni slices (4-8 per chicken breast)

Shredded Italian Cheese Blend or Mozzarella Cheese

Parmesan Cheese Crumbles (the powdery kind, not the slivers)

Provolone Cheese Slices

1-2 cans crushed tomatoes

Garlic Powder

Salt

Pepper

Italian Seasoning

Olive Oil

Directions

Step 1: Butterfly the chicken

You want to use fresh or completely thawed chicken breast, not frozen! If they are large, I recommend cutting them in half, before butterflying. If they are thick, I recommend using a meat mallet or a heavy pan to thin them out, after butterflying.

Step 2: Create layers

To one half of the butterflied breasts, sprinkle salt, pepper, garlic, and Italian seasoning. This will be the “bottom half”. To bottom half, sprinkle on shredded Italian blend or mozzarella cheese. Top cheese with pepperoni slices. Sprinkle on parmesan cheese and additional Italian/mozzarella. Carefully fold over the other half of the chicken breast to create top. To top, sprinkle additional salt, pepper, garlic, and Italian seasoning.

Step 3: Preheat Oven to 350F

Step 4: Sear Chicken

Heat the olive oil in a skillet over medium heat. Once hot, carefully add chicken breasts 1 or 2 at a time to sear. Flip once to sear opposite side. Place seared breasts in a casserole dish.

Step 5: Prepare Chicken for Baking

Once all breasts have been seared and assembled in the casserole dish, pour crushed tomatoes over top the breasts until covered. Liberally sprinkle garlic powder and italian seasoning over top. Sprinkle a moderate amount of salt and pepper over top. Bake at 350 for 30-45 minutes until done, or until a meat thermometer inserted into the thickest breast reads 165F.

Step 6: Broil Cheese Topping

Once the chicken has baked through, add 1 slice of provolone cheese atop each breast and return to oven on BROIL until cheese is bubbly and browned. Remove from oven and serve hot!

Enjoy!
Riss


Bacon Butternut Squash Soup with Goat Cheese Crumbles

Bacon Butternut Squash Soup with Goat Cheese Crumbles

This is one of my absolute favorite soups to make! It’s quintessentially fall. Bacon and goat cheese MAKE this soup what it is! This soup is savory, not sweet, so if you have been shying away from butternut squash soups because they are too sweet for your taste, then THIS is the recipe you need. 🙂

As usual, I skip the process photos and hobknob to dive right into how to make this delicious dinner. Double the recipe if you have a large family or one that eats a lot (or you want leftovers!) – this recipe makes about 8 cups.

Ingredients:

1 med-large Butternut Squash (OR 4-6 cups of frozen cubed butternut squash)

16oz chicken stock or broth

1lb bacon

1/4 to 1/2 cup goat cheese crumbles

1 cups almond milk (or milk of choice)

Approx. 1Tbsp Minced garlic (or garlic powder to taste)

Approx. 1-2 Tbsps Minced ginger ( I use the squeezy kind, fresh would work too)

Approx 1-2tsps. ground sage (to taste)

Salt to taste

Pepper to taste

Directions:

STEP 1: Cook the squash

If you are using FRESH butternut squash:

There are several ways to cook a fresh butternut squash. My favorite way is to halve, de-seed, and roast in the oven at 400F for 40-45 mins, or until fork tender, then scrape out the flesh.

You can also peel and cube the squash first, then boil, microwave, pressure cook, or roast the cubes. I hate peeling the squash so I do it the above way.

If you are using FROZEN cubed butternut squash:

You can boil, roast, microwave, or – my favorite way – pop them in an Instant Pot for 15 minutes.

Regardlessof what method you use, step one is going to be cook the squash until it is tender and the flesh is mashable.

STEP 2: Cook Bacon

While the squash is cooking, cut the pound of bacon into small pieces. I like to use kitchen shears for this – it makes it sooo easy! Cook pieces in a skillet until CRISPY, but not burnt. Reserve a tablespoon of bacon grease to add to the soup (optional).

STEP 3: Puree the squash

Use an immersion blender or a regular countertop blender to puree the squash. Be careful of splatters because the squash will be HOT!

If you are using an immersion blender, add the chicken stock 1 cup at a time and blend until it reaches a thin, smooth, puree. Add garlic and ginger and blend one final time.

If you are using a countertop blender, add a little cooked squash and a little chicken stock to the blender cup and blend in batches until all the squash is pureed. To the last batch, add garlic and ginger.

Return squash puree to a large pot on the stovetop and set heat to medium.

STEP 4: Thin the soup.

Whisk in almond milk (or milk of choice) a little at a time until soup reaches desired consistency. If you need more than 1 cup of milk, switch to water so that the soup doesn’t get too milky. Reduce heat to low if it begins to bubble.

STEP 5: Season, Assemble, and Serve!

Add salt, pepper, and sage to taste. Add additional garlic and ginger as needed. Add bacon (and bacon grease if desired). Add goat cheese. Stir to mix and serve hot!


To add a little extra veggie power to this meal, you can also cook, puree, and blend in:

  • pumpkin
  • acorn squash
  • carrots
  • leeks

I sometimes add a little Shakeology Power Greens too! I also like to serve this soup with cornbread or pumpkin bread. #allthingsfall 🙂

Enjoy!
Riss


Bourbon Chicken Tacos

Chicken breasts are pressure cooked with cola to make tender shredded chicken that is then coated in a sweet bourbon glaze. Paired with spicy salsa and crisp cilantro, these tacos are to die for!

Let me start by saying I have never made these before but I will DEFINITELY be making them again! The crisped shredded chicken tossed in a bourbon glaze is the star of this meal. Honestly I could have just eaten that out of a bowl and skipped the whole “taco” part (the glaze is honestly to die for and would be amazing over porkchops as well)! However, the addition of the spicy salsa and cilantro, all wrapped in a white flour tortilla, made this meal transcendental.

Now, if you know me or have read any of my other “recipes”, you should know that my recipes are more a guide than a set of hard rules and measurements. I’ll approximate the measurements here but please note I did not measure any of the below ingredients while I was actually making this meal. When in doubt, use less, taste, and add more as needed!

I also don’t take process photos. So without further reading and scrolling past a million photos, here is the recipe!


BOURBON CHICKEN TACOS


INGREDIENTS:

  • 2 Large chicken breasts (about 1.5lbs of chicken)
  • 1/4c. applesauce
  • 1c regular cola (i.e Coca-Cola or Pepsi) for chicken, plus 1/4 cup cola for glaze
  • 1/4c chicken stock
  • 1/2 cup brown sugar packed (or 3/4 cup unpacked)
  • 1/4 cup soy sauce
  • 2TBSP rice vinegar (I used garlic flavored rice vinegar)
  • 1TBSP minced ginger
  • 1/2TBSP minced garlic
  • Bourbon of choice, 1-3oz.
  • 2 to 4TBSPS Oil of choice (i.e. coconut, avocado, butter, etc.)
  • White Corn Tortillas (I prefer Mission brand)
  • Mango Habanero Salsa OR Mild Pico de Gallo and fresh Mango
  • Chopped cilantro
  • Cotija Cheese OR Powdered Parmesan

DIRECTIONS:

For the Chicken:

  • Place chicken breasts in Instant Pot with chicken stock, applesauce, and 1 cup of cola.
  • Set to pressure cook high for 20-30 minutes (30 minutes if frozen, 20 minutes if thawed or mostly thawed)
  • Start glaze while chicken is cooking!

When the chicken is done:

  • quick release pressure
  • Shred chicken (tip: use a hand mixer!) and drain, pressing as much liquid out of the shredded chicken as possible.
  • In batches, place chicken into skillet with 1TBSP oil of choice (I used coconut oil, but you could use any oil), and allow to fry until pieces have a slight crisp/crispy edges.

For the Glaze:

  • Add brown sugar, soy sauce, rice vinegar, ginger, garlic, and 1/4cup cola to a sauce pan
  • Bring to a boil, then reduce heat and simmer until reduced to a thick sauce, whisking continuously.
  • When the sauce has thickened add bourbon 1oz at a time to taste. You will likely need to reduce the glaze for a few minutes more if you did not make it thick enough prior to adding the bourbon.
  • Set aside – glaze will continue to thicken as it cools.

ASSEMBLY:

  • Pour glaze over crisped shredded chicken and toss to coat.
  • Steam corn tortillas by wrapping in a damp towel and microwaving for 40 seconds, flipping halfway through (you may need to microwave longer if steaming lots of tortillas at once)
  • Layer chicken onto tortilla, drizzle with Mango Habanero salsa, and top with chopped cilantro and cotija cheese.
  • ENJOY!
Bourbon Chicken Taco on White Corn Tortilla topped with Mango Habanero Salsa, Chopped Cilantro, and Cotija Cheese

Watch the replay of my live cooking video here and follow me on Twitch to catch future cooking livestreams!

xo,

Rissa

Easy Dinner Recipes: “Philly Cheesesteak” Bowls

Life has been extra crazy lately, and I’m not talking about the current COVID-19 Pandemic and the prolonged social distancing the US is facing right now. That’s crazy too, but since my husband and I both work from home already, and we homeschool, our day to day routines haven’t been too affected – other than not being able to attend social functions and keeping our daughter home from dance classes and playgroups.

No, my life is crazy because I am:

  • in the middle of a complete re-brand and moving over to an all new, professionally designed, website
  • developing an online course, for Pinterest management using Tailwind, under the new brand
  • working with a therapist in an RDI program for my daughter’s newly diagnosed Autism and implementing this at home
  • pushing through several MAJOR home renovations in preparation for listing our house for sale
  • planning a BIG 800 mile move

You know, all on top of managing the day to day work for my clients’ Pinterest accounts, living with chronic illness and navigating the “bad days” , homeschooling, and running a home. NBD, right?

All that to say, I really really really appreciate a meal that doesn’t require me to put a whole lot of effort into it. If it can be made in 30 minutes or less, it’s a keeper! Bonus points for being low carb.

These Philly Cheesesteak bowls check all the boxes! Plus, you only need 4 main ingredients, and some common seasonings.

I’ll remind you that you won’t see much by way of measurements in my recipes. I cook intuitively – which means I wait for the spirit of my ancestors to tell me I’ve used enough seasonings!

Really, I taste as I go and adjust accordingly. I recommend you do too. Just remember you can always add MORE of something, but you can’t take it back! So start with a little and add a little more at a time as needed.

Without further ado… Philly Cheesesteak Bowls!


Ingredients:

  • THIN sirloin steaks OR Shredded Steak (4-6 thin steaks, they came in packs of 3 from my grocery store, or 2 packs of shredded steak)
  • 2 Green Bell Peppers
  • Bag of Frozen Cauliflower Rice
  • Shredded Mozzarella (I used about 4 handfuls, so maybe 2 cups?)
  • Milk or non-dairy milk of choice (we use unsweetened Almond milk)
  • McCormick’s Montreal Steak seasoning (or steak rub/seasoning of choice)
  • Worcestershire sauce
  • Soy Sauce
  • Salt
  • Black Pepper
  • Oil (olive, coconut, canola, whatever)

INSTRUCTIONS:

  • If using thin sirloin steaks, cut steaks into narrow strips.
  • Dice peppers.
  • Place meat into skillet and brown, stirring frequently.
  • Season meat liberally with Montreal steak seasoning (or seasoning of choice) and cook through.
  • Add roughly equal parts Worcestershire sauce and soy sauce – Listen to your ancestors! Or, add a little at a time until it tastes good. You want there to be enough liquid to form a sauce once the cheese is melted in.
  • Melt in 2 handfuls of mozzarella cheese.
  • In a small skillet, saute peppers in oil of choice until softened (about 3 to 5 minutes)
  • Microwave frozen cauliflower rice for 5 minutes.
  • Add cauliflower rice to peppers and season with salt/black pepper.
  • Add a little milk to veggies and melt in 2 handfuls mozzarella cheese. Add more milk as needed.

    Serve combined or over plain rice if you aren’t worried about the carbs!


You could probably do this all in the same skillet but, if you have kiddos who aren’t likely to eat the cauli rice/pepper mixture, like I do, using two skillets allows everyone to layer their own bowl however they want to.

Enjoy!

xo,

Marissa

SOOOOOO DELICIOUS!!!

Easy Sun Cake Recipe

This sun cake is so easy and delicious! This cake is light and moist, and is topped with a orange cream cheese “glaze” – not a heavy frosting! Using a ROUND cake pan , yellow cake, and oranges, this cake represents the Sun and is perfect for celebrating winter solstice (return of the sun) or as a summer treat!

Ingredients:

  • 1 box yellow cake mix PLUS the needed ingredients listed on the box (eggs/oil)
  • 2-3 cups mandarin orange slices in juice or water (the canned kind)
  • 1 block of cream cheese
  • 1 cup of sugar

Cake Instructions:

  • Prepare cake batter as directed on box with eggs and oil, BUT DO NOT ADD WATER.
  • Blend 1 cup of canned mandarin oranges and add to cake batter.
  • Add batter to greased cake pan and bake as directed on box for pan size/type. (You may need to bake it longer, but check it at the time indicated for doneness). I use a ROUND cake pan.

Frosting Instructions:

  • In a microwave save bowl, melt 1 block of cream cheese in the microwave using 30 second intervals. Stir every 30 seconds until uniformly melted and creamy.
  • Add 1 cup of sugar to the bowl and combine thoroughly.
  • Blend 1/2 cup of canned mandarin oranges and add to cream cheese mixture. Combine thoroughly

Assembly:

  • Turn out cake onto a cake plate or other flat dish and allow to cool slightly. You don’t want it to be too hot, but it needs to be warm so the frosting will glaze a bit while still covering the surface evenly.
  • Poke a few holes in the cake and pour the cream cheese glaze over the cake, starting in the middle. Allow to drip over the sides.
  • Decorate the top of the cake with remaining orange slices and serve!

Easy Lemon Cake Pops

Cake pops have to be the most versatile dessert ever. You can decorate them and flavor them a million different ways. You can leave out the sticks and turn them into “cake truffles” or “cake balls”. They are ready-to-eat in perfectly portioned sphericals and darn it if they just don’t make everyone happy!

I LOVE cake pops. I don’t have all the fancy cake pop makin’ gadgetry – just do a search for cake pop molds on Amazon and you’ll find all kinds of goodies to make your cake pop making experience much more “professional” and supposedly easier too. But I don’t use any of that stuff. Would I like to? Yes. But I don’t really have the space to store said stuff and I really really don’t need any more excuses to make cake pops more often.

If you want to use the gadgetry, by all means, go right ahead! But if you don’t have the fancy tools, you CAN still make yummy cake pops fairly easily! We made these lemon cake pops for summer solstice this year and 5 days later they were all gone!

WHAT YOU’LL NEED

  • yellow cake mix plus ingredients on box (eggs, oil, water)
  • LorAnn lemon oil
  • 16oz yellow candy coating (vanilla flavored) – like these
  • vanilla buttercream icing
  • cooking spray/oil

TOOLS

  • 9×12 baking dish
  • large mixing bowl
  • hand mixer
  • rubber spatula
  • cookie sheet
  • wax paper/freezer paper
  • double boiler, or 1 medium pot and 1 small pot
  • cake pop sticks – i.e. paper straws, bamboo skewers, etc.
  • cake pop stand (commercial or DIY)

INSTRUCTIONS

  • Prepare cake batter as instructed and add 1 vial of LorAnn lemon oil to batter. Bake as directed. Be sure to coat your baking pan with oil/cooking spray!!
  • Allow cake to cool completely then turn out in pieces into the mixing bowl
  • Mix in icing 1 spoonful at a time until cake is able to be formed into balls. You want the consistency of the resulting “dough” to be moist enough that the cake balls do not fall apart. If you add too much icing, the balls will too soft to stand upright on the sticks – so just ditch ’em! The cake balls will still taste yummy, they’ll just be a bit softer in the middle. 😉
  • Form the “dough” into 1 inch balls, insert sticks, and place on cookie sheet covered with wax or freezer paper. Freeze for 1-2 hours.
  • When the cake balls have frozen and are firm, assemble the double boiler (or use the 2 pot method).
  • Melt candy coating in the double boiler/top pot, over medium heat, stirring constantly to avoid burning/seizing.
  • Carefully dip each cake pop into the melted coating. Either return the dipped cake pop in a standing position to the wax paper (you will have a flattened “top”) or place pop in a stand. (Tip: Sytrofoam lids, cardboard boxes, and some colanders make easy impromptu stands.)
  • Place finished cake pops in the refrigerator and allow coating to cool completely.
  • Eat and Enjoy!

This is a pretty basic recipe. Experiment with different cake flavors and icing combos and add sprinkles or an icing drizzle or even fondant flourishes to make your own special cake pops!

And don’t stress if they don’t turn out perfectly – several of ours had some less than perfect candy coating (I let hubby and the kids dip them), it’s whatever. I don’t claim to be a “Pinteretst perfect” mom, so what you see in our pics is never a doctored up reality 😉 IMO, it’s the experience and memory-making that matters.

XO,
Marissa

30 Minute Meals: Saag – A modern take on a classic Indian Favorite!

This past Christmas I made my family gift baskets with recipe cards I wrote out, printed, laminated and placed onto a binder ring (so that it can be added to), and the ingredients to one of the recipes. Turns out, they were a hit and every time one of them tries a new recipe of mine, they text me to tell me how much they loved it! Which makes my heart so so happy because I am an “intuitive” cook and I don’t really measure my ingredients. As you can imagine, this makes writing down / sharing my “recipes” difficult. (How much salt? I dunno. Throw in a pinch at a time til it tastes good!)

The recipe my family members have been going ga-ga over recently is my version of saag. I LOVE Indian cuisine and over the years I’ve (systematically) gotten my mom, dad, brother, and husband all addicted as well. (Mwahaha!) But the closest GOOD Indian restaurant is across the river in the city and I just honestly don’t want to always go over there to get it.

So I started experimenting with Indian spices and recipes at home and came up with this gem. It’s quick and super easy! It’d be a one pot meal, but because you have to make the rice separate, it takes two. (Honestly I throw the rice in my instant pot before I even start the rest of the meal).

This recipe calls for some specific Indian spices, which you can order online or if you happen to have a Jungle Jim’s nearby (Hello Cincinnati!) then I know you can find them there (because that’s where I got them).

Also, if you’re expecting traditional “puree” style saag, that’s NOT what this recipe makes. This is a “take” on saag – you might call it faux saag or keema saag or chunky fresh saag… I just call it saag and everyone in my family knows what that means. It has spinach in it so I’m not totally wrong 😉

Make it meat-free by simply omitting the ground beef! I’ve made it this way too and it’s just as tasty and filling!

Enjoy!
-M