Our Third Grade Homeschool Recap

We are wrapping up third grade this summer and I just placed our order for 4th grade materials the other day! Since we homeschool year-round, we are able to stretch the work out and do less work each day. Last year we focused heavily on reading and K has now been reading a minimum of 45 minutes EVERY day! With the “learning to read” hurdle out of the way, we were able to shift focus to spelling and grammar this year, as well as level up our math program.

Since we are more on the unschooling side – we do not do much structured learning for things like science, art, etc. but I will list the resources we used below for those times we DID do sit-down explorations for science and social studies.

Here’s the recap of what we used this year to make up our Third Grade Homeschool curriculum!

Please note, this post does contain Amazon Affiliate links. If you choose to purchase after clicking a link, I may receive a commission at no extra cost to you. Other links that do not route to Amazon are non-affiliated. ALL of our links are to products personally used by us.

Language Arts

For grammar we chose to use a workbook that would span multiple grades, so far I LOVE this workbook. Each concept has an explanation page and then a practice page. Concepts covered in 3rd grade level include subject, predicate, nouns, proper nouns, pronouns, verbs, action verbs, etc.

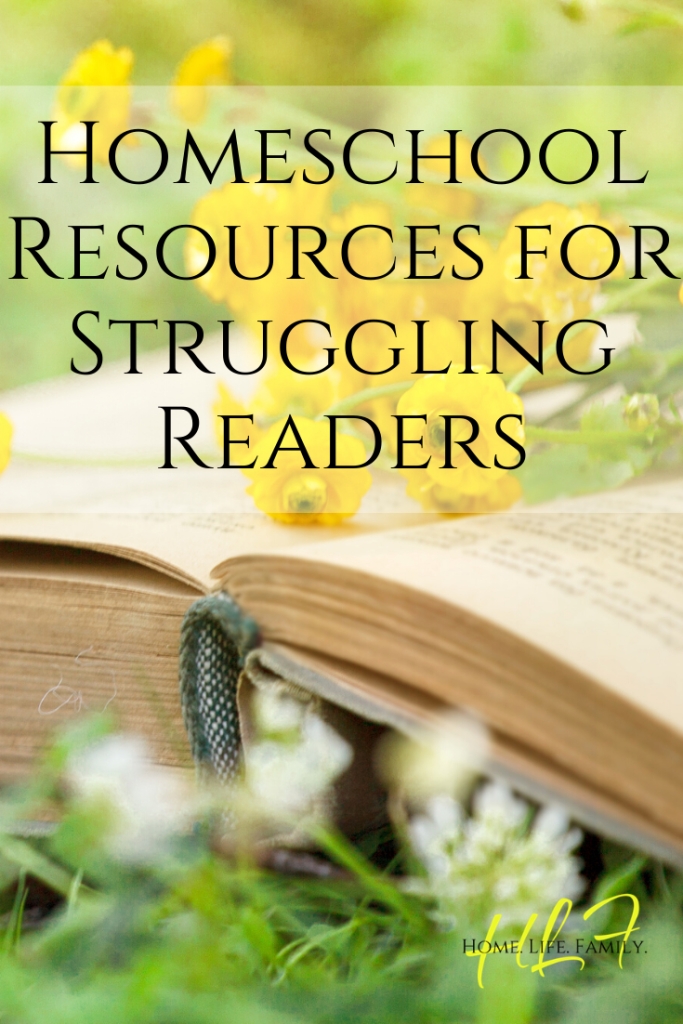
For spelling, I spent a LOT of time researching various workbooks and curriculum. For kids like K, who have visual processing delays, autism, or ADHD, working memory can be a HUGE challenge. When working memory is difficult for a child, the traditional methods of teaching spelling via word lists and memorization DOES NOT work. Instead, we opted for Spelling U See, which employs a method involving “chunking”. Each week, a short passage is used and students must chunk out specific parts of words, such as vowel chunks or consonant blends. Through repetition, reading the same passage each day and chunking each day, students learn to visually recognize the shape and composition of words. Then they are given dictation at the end of the week.

I honestly wasn’t sure if Spelling U See would help K or not. I was skeptical that simply reading the passages and doing a few chunking exercises each week would actually teach her how to spell, but it has! I highly recommend this program to anyone whose child was a struggling reader, has visual processing delays, dyslexia, adhd, autism, etc.

In addition to her formal workbooks, K is required to read 45 minutes a day for homeschool and may choose to read additional time to earn electronics time.
We “bank” each 30 minutes read as 30 minutes of free-play electronics time. This method has worked WONDERFULLY to both incentivize her to read and to control how much electronics time she uses. A couple of her favorite books this year have been the “Foxcraft” series and the “Wolves of the Beyond” series. Also, “Star Friends” and the “Diary of and 8-bit Warrior” Minecraft books.

Math

We started out the year using Spectrum Math workbooks but switched to Beast Academy halfway through. With math concepts getting more difficult, especially for a child with autism and working memory difficulties, the workbooks were no longer cutting it. K benefits from multi-sensory approached to learning, and despite her visual processing delays, does actually need visual teaching strategies. The workbooks were too dry and bland and did not offer enough instruction or visual material to keep her focus.

Beast Academy includes math instruction for each new concept via comic book style panels and dialogue between various characters. The online version, which we are currently using, also includes instructional videos which are simple and broken down into small pieces throughout the learning pathway. K does still struggle with executing the math concepts, but having the comics and videos to refer back to has been immensely helpful, especially as a parent who doesn’t really know how to teach math beyond the basics. I can help her navigate and solve the problems, but having the pathway set out for me and the instructional portions taken care of for me has been so very helpful!

Beast Academy does also have physical workbooks, which we have purchased for the 4th grade year, but the online curriculum is the best I have seen, and we have tried several online platforms (IXL, Miacademy, Time4Learning, etc).

science & Social Studies

As I said before, we do not structure science or social studies with a traditional curriculum or learning pathway. What we HAVE done this year is utilize some resources to help facilitate learning. One resource we used that K REALLY loved is Snap Circuits.
Snap Circuits explore and teach electrical circuitry using project-based learning. Different sets have different projects, but I’d recommend starting with the SC-100 set. You can always purchase other sets later as “add ons” since they do all work together.

We also used Nature Anatomy and an accompanying workbook I found online. Granted we did not get far through the book/workbook, and we will likely continue to use this in the upcoming year. Nature Anatomy introduce important concepts like the rock cycle, formation of volcanoes, plate tectonics, life cycles, the water cycle, etc. This book (and the others in the series) are so beautifully illustrated, they are honestly just nice to have!

We also used media such as How It’s Made and YouTube for whatever random questions and explorations came up during daily life.

For Social Studies, we continued using “101 Awesome Women who Changed the World” and learned about the Samurai and Native Americans using our Honest History magazines.

If you haven’t heard of Honest History, I HIGHLY recommend you check it out! History can be a beautiful subject, or it can be dry and boring… Honest History is definitely the former. Each magazine is colorful and informative in a fun way! You can get a subscription for $50 a year or you can buy individual issues from their website. These magazines are recommended for ages 6-12 but I thoroughly enjoyed them as well, and I’m quite a bit older than 12 😉

And there you have it! I am excited to add in a few new things for 4th grade, including cursive, writing, and an Early Times history focus. We’ll be finishing up our third-grade work over the next month and then I’ll definitely be posting those new resources once we’ve had a chance to explore them a bit!

Citrus Poblano Tacos/Bowls

Ingredients

1 lb ground sausage (NOT Italian style)

1-2 Poblano Peppers

1 onion

Mince Garlic (about 1-2 teaspoons)

Orange juice (about 1/2 cup)

Lime Juice (about 1-2 Tablespoons)

Tomato Paste (about 3-5 Tablespoons)

Chili Lime seasoning (Tajin with lime) to taste

Salt/Pepper to taste

Cilantro

Tortillas (or prepare 3/4cup basmati rice to make a taco bowl)

Sour Cream

Oil of choice (about 1 Tablespoon)

INSTRUCTIONS

De-seed and dice or thinly slice poblanos

Dice or thinly slice onion

Sauté veggies and minced garlic in a small amount of oil until softened. Add lime juice about halfway through.

Add ground pork to veggies and cook through.

Turn heat to low and add orange juice and tomato paste and stir until an evenly distributed sauce forms. Add additional orange juice/tomato paste if needed to evenly coat the sausage/veggies.

Add salt and pepper to taste.

Serve over rice or in tortillas with sour cream and cilantro.

NUTRITIONAL INFO

Prepared as tacos with no sour cream (serving size: 2 tacos)

  • Calories: 511kcal
  • Fat: 20g
  • Protein: 25g
  • Carbs: 56g
  • Fiber 5g
  • Net Carbs: 51g

Prepared as bowls with basmati rice and no sour cream. Per serving (1/4 recipe plus 1/2 cup cooked rice)

  • Calories: 412kcal
  • Fat: 18g
  • Protein: 22g
  • Carbs: 38g
  • Fiber 4g
  • Net Carbs: 34g

Citrus Poblano Tacos shown here prepared as a bowl with no sour cream for a gluten/dairy free alternative.

Our Favorite Family Games To Play At The Table

We play a lot of games together as a family. A LOT. Board games, card games, dice games, video games… games for fun and educational games. We are just a gamer family (shrug). I mean we taught my daughter Uno when she was 3. I’m not even sure she knew all her numbers at that point, but we played Uno together as a family quite a bit because that’s what she could play! Now she’s 7 and my son is going on 19 – our game collection (both tabletop and video) is EXTENSIVE.

So believe me when I say we know games.

Now, you might be thinking of all the “traditional” games like Monopoly or Battleship or even Risk and Scrabble… and yes we have those too. But those are by far NOT our favorite games to play. We like games that are little more… involved? A little less “see-who-gets-to-the-last square-first” and a little more unique.

In no particular order, I present to you – Our Favorite Family Games!

1) Dominion

I know I said these weren’t in any particular order, but Dominion IS probably our favorite game out of all of our games. It is a MASSIVE card based game with over 12 expansions. At one point we owned every expansion that existed but I believe we are short 1 or 2 as of this post writing. This game is different every single time you play, with more expansions providing even more play strategies and variations. You don’t NEED any expansions to enjoy this game but I guarantee you’ll WANT them after you get the hang of how to play.

Our daughter does not yet play this game as it involves quite a bit of reading – each card has a different “function”, and actions you can take within the game, printed ON the cards – and some advanced strategy. This game plays well as a 2 player game but I find it to be the most fun with 3 or more. It can be a lengthy play, some of our playthroughs have taken 2-3 hours or more – depending on how complex we’ve chosen to make it with the various cards in play. A simple, straight forward, no-frills, game setup could probably be played through in 45 minutes or so.

Our favorite expansions:
Hubby’s pick: Prosperity, for the higher value money and point cards introduced
My pick: Seaside, for the duration effect cards introduced

NOTE: I highly recommend getting the BIG BOX set if you are looking to invest in the game, as it comes with the Intrigue expansion which adds a lot of playability from the get-go and you CAN NOT get this expansion as a stand-alone set anymore!

2) Alhambra

Alhambra is a tile based, city-building game and plays well as a 2 player game. It accommodates up to 6 players – adding more players tends to change the strategy of the game a bit and significantly increases the speed of the game play. 2 players could play through this game in roughly an hour, whereas 4 to 6 players could finish in under and hour.

We recently taught our 7 year old this game and I love it for it’s education value regarding money management. Part of the strategy of this game is collecting enough money of a certain color to hopefully purchase the tile piece you need to add on to your city. Critical thinking and spatial orientation skills are exercised in determining just how to structure your city.

Advanced players will enjoy the strategy of purchasing pieces that will help you get more points than your opponent(s) or force your opponents into taking a less desirable piece. This game includes just enough random chance to be satisfactorily re-playable, balanced with strategic play that is easy to repeat.

3) Sushi Go party

Sushi Go Party is a stand-alone expanded version of the card game, Sushi Go! Sushi Go Party includes all the same mechanics of the fast paced Sushi Go! with the added benefits of more variety, and the ability to have up to 8 players (versus 5 players max for the original Sushi Go!). This game plays best with 3 or more players and the difficulty level can be tailored up or down for younger or advanced players.

The game consists of 3 rounds and can be played through in 20-30 minutes. It’s a cute game and is fairly strategy-light when using the basic cards. We picked this game up when K was 5 or 6 and it was really easy for her to learn! We often play this at family get-togethers too. Overall this is an adorable, lighthearted game for all ages!

4) Ticket to Ride – Europe

This is a game based on collecting colored “tickets” to complete legs of various train routes, in order complete “trips” and earn points. You’ve probably even seen this game in big box retail stores as it’s gained in popularity over the last ten years.

There a SEVERAL versions of this game including the original version, which is based on a map of the continental US, as well as versions for Nordic countries, Japan, India, and a “first journey” edition aimed at younger kids. The Europe edition is our favorite as it is slightly more complex than the original version with added game mechanics.

Our 7 year old can play this game and although she hasn’t quite grasped the larger strategy of the game yet, she’s getting there. From a homeschooling perspective, I love these games to introduce/reinforce some World/US geography.

The game accommodates up to 5 players (depending on version) and can be played through in roughly an hour, give or take. As a 2 player game, it provides an easy relaxing night of fun – with more players things can get a bit more competitive as critical routes become more highly sought after. This is one of our “go to” games!

5) Quiddler

This word-building game was first introduced to me by my bestie and her family during a summer trip to Pennsylvania. I ordered it from Amazon before I even got home so that it would be waiting for me, I was that excited to share it with my family. Actually, my husband is the only one in our home, to date, to actually play it with me as our daughter is not yet spelling-advanced enough to do so and our son is living states away.

Scrabble-esque, this game requires you to make words with drawn letter cards, starting with a 3 card hand and working up in rounds to a 10 card hand. In Scrabble style, more common letters are worth fewer points while letters like W, X, or Q are worth 10, 12, or 15 points (respectively).

This is probably my favorite TWO PLAYER game simply for it’s ease of set-up, duration of play, and medium-level of strategy required (hubby and I often play this game before bed). However, it accommodates up to 10 players. Play through can take anywhere from 20 minutes to over an hour, depending on how many players, how quickly you draw the letters you need, and how much you fish for those higher point value cards!

We have SO MANY other games that we love, that my list was growing too long to include reviews of them all in one blog post (LOL)! So I’ve simply linked the rest below so you can check them out (though I’ll likely return to review some of these in another post 😉 ).

What are some of your family’s favorite games? Let me know in the comments! We are always on the hunt for new games to add to our collection 🙂

xo,
Rissa

ADDItional games we recommend:

Homeschool Resources for Struggling Readers with A Multi-Sensory Approach

My daughter is 7 and has been homeschooled her entire life (we started when she was 3). She struggles to read – has always struggled. Part of that is due to a visual processing delay, part of that is due to very low frustration tolerance, and part is due to lack of focus and other aspects of autism that affect her learning.

Over the last year, we decided to focus ONLY on language arts and math, pushing phonics and reading skills more than anything else to help her get caught up. The beauty of homeschooling is the ability to slow down or speed up learning, based on your child’s needs, and tailoring their lessons to their skill level.

In our homeschool we use an arsenal of resources including games, workbooks, media, manipulatives, etc. which I have SCOURED the internet (ok let’s be real… I scoured Amazon) to find.

If you have a struggling reader at home, check out these resources! We use a combination of these daily and have seen a LOT of improvement in her reading ability!

180 days of spelling & word study

These workbooks are fantastic! We’ve worked through grade 1 and are on track to finish it in time to begin grade 2 this fall. I credit this workbook with the majority of progress we have seen this year. It is very logically orgnanized, and provides a one page daily exercise to strengthen vocabulary, spelling, and reading. This workbook focuses on phonics to create weekly word groups, explores changing verbs to past and present tense, provides sentence context and sentence building practice, and more. I already the grade 2 workbook in my Amazon cart and will be clicking that buy button within the next few weeks.

Handwriting Practice Paper

Every week we use the vocab list for the 180 days book and I have K write the words one or two times each. I got really tired of trying to use spiral bound notebooks or loose leaf paper for this – the notebooks I had on hand were all college ruled and I honestly hated the thought of buying a wide ruled notebook. I wanted lines with the dotted middle line for her and I wanted to be able to use the same notebook for the whole year. This book of 100 pages (it comes in a 200 page option too) fits the bill! We use it for ALL of our writing practice, from handwriting practice to sentence building. It’s easy to recognize too, as opposed to non-descript school notebooks that tend to get lost in the shuffle more often than you’d think.

BOB BOOKS

I LOVE these little books. Each short story focuses on a handful of key letters/sounds, which build on each other as you progress through the set. We’ve worked through 2 sets of these, are currently in the middle of set 3, and I fully anticipate buying future sets as K progresses further. I also really love that the illustrations are simple and use only 1 or 2 colors throughout the whole book. For kids with visual overwhelm (or a visual processing delay) reducing the amount of “noise” on the page is VERY helpful! There are also Bob Book Workbooks that have accompanying activities for extra practice/immersion.

Big Box of Sentence Building

This was a recent addition to our reading toolkit. It’s admittedly a little overwhelming with how MANY words are included in this box. BUT, we took the opportunity to sort the words into various parts-of-speech. So now we have sandwich baggies of “verbs”, “nouns”, “prepositions”, “pronouns”, etc. If you get this, I HIGHLY recommend sorting the words in this way, because it is MUCH easier to find the words you need when practicing sentence building.

We use these tiles to build silly sentences, or to use her words of the week from her 180 days workbook in sentences. Or I will build a sentence and have her read it for practice. There are a myriad of ways to use this resource!

my first bananagrams

This is a version of the classic bananagrams that is geared toward younger kids and early readers. Letter tiles are bigger and differently colored, with vowels standing out in yellow among red, blue, and green consonants. Some double letter tiles are included like “oo”, “th”, “wh”, “at”, “ea”, etc. It does come with instructions for game play, but we tend to use these as manipulatives to practice spelling “by ear” (given a word, find and arrange the correct letter tiles to make the spoken word), or to practice word families.

learning palette

There are also SO many packs that can be used with the palette base, not just reading based packs. There are packs for addition and other math concepts too! I like to select one “sheet” from the packs we have and use this as a warm up activity. It requires a little visual scanning, critical thinking, and fine motor skills. This palette is a great addition to a multi-sensory approach to reading and best of all, it is self-correcting (answers on the back). Once you buy a kit with the base, you can simply search for the stand alone packs, like this one, to add on as needed and there are various grade levels to choose from!

my first reading library

From Usborne Books comes this FIFTY book, phonics-focused, library for emerging readers. Starting with the green level, kids and adults take turns reading, gradually increasing the amount of words and pages the child reads as you progress through the set. Pages meant for adults to read aloud are in smaller text, while pages meant for children to read aloud are in larger text. The stories are short and cute, and the books include reading comprehension questions/activities at the end of each story. We do one of these about every other week, as the reading skill needed increases with each book, at a more rapid pace than the Bob Books, and the illustrations tend to be a bit distracting with lots of color and detail.


In addition to the above resources, we also utilize media like Teach Your Monster To Read and Education.com. I also have a WISHLIST of items from Amazon that I’d like to add to our arsenal. Some of the items on this list are:

Teaching your child to read, especially when they have special needs associated with autism or ADHD or visual processing delay, can be frustrating and difficult at the best of times. I know there are have been so many days I have literally cried feeling as if I am failing at this homeschooling thing. But, over time I HAVE seen definite improvements, and each week seems a little less difficult than the last. I credit the tools and resources we are using. Some kids just need a different approach. For us, a multi-sensory approach works best and we love mixing and matching games, media, and workbooks for our language arts and early literacy lessons.

Please leave a comment and let me know if you have tried any of the resources listed and how they’ve worked for your family!

xo,
Rissa

Instant Pot Sweet n’ Smoky BBQ Meatballs

I don’t often follow a pre-made recipe. In fact I’d say that unless I’m baking something, I basically never follow a formal recipe. Recipes are like jumping off points, inspirational guidelines, if you will.

I say this because you’ve probably seen a recipe or two already that calls for grape jelly to make those slow cooker party meatballs or lil’ smokies sausages. The recipe below also calls for grape jelly, so you might think this recipe is just more of the same that you’ve seen before. But you’d be wrong my friend.

Most of those recipes call for frozen pre-made meatballs. We’re not going to do that. Oh no. We’re going to whip up a batch of homemade meatballs and it’s going to be so easy and tasty you’re going to wonder why you ever bought those frozen ones.

(Of course, no judgement if you DO want to use frozen meatballs. You do you, boo.)

NOTE: YOU WILL NEED A FOOD PROCESSOR FOR THIS RECIPE!

ingredients:

  • 1/2lb ground hamburger
  • 1/2lb ground country style sausage (not italian!)
  • 4 slices maple or hickory bacon
  • 1-2 eggs
  • 1 jar grape jelly
  • 1-2 bottles bbq sauce (I recommend something like Sweet Baby Ray’s in an original or hickory flavor.)
  • Cardamom (about 1-2tsps)
  • Ginger (about 1-2tsps)
  • Ground Sage (1/2 TBSP plus 1/2 TBSP)
  • 1tsp Salt
  • 1tsp Black Pepper
  • 2TBSP Oil
  • 1/2 cup water.

directions:

Step 1: Prepare the meatball mixture

In a food processor, add all meats, 1 egg, cardamom, ginger, 1/2TBSP sage, salt, and black pepper. Pulse until everything is well mixed. If the mixture does not combine well enough (should be easy to scoop and roll into ball shape), add the second egg and re-mix.

Note: Go light on the cardamom, you can always add more into the sauce if you feel it’s needed. Too much cardamom can be overpowering.

Step 2: Shape meatballs and brown

Using a soup spoon, scoop mixture and shape into roughly 1 inch balls. (If you make them too big, they will need to cook longer in the IP). Heat oil in a skillet and brown meatballs, gently turning so they don’t fall apart. You do not need to cook them all the way through! Browning helps them retain some shape and keeps them from sticking together in the IP. (You can skip this step if you’re short on time. I’ve done this recipe both ways and they’ve turned out fine without pre-browning.)

Step 3: Pressure Cook

Place meatballs in IP. Add 1/2 cup water to bottom.Add in 1/2TBSP ground sage. Pour bbq sauce over meatballs. Scoop out grape jelly on the very top. DO NOT STIR/MIX!!!!
Cook on high pressure for 10 minutes. Allow to naturally vent for 5 minutes, then quick release the pressure.

Step 4: Thicken sauce

You MAY need to thicken the sauce if it is too thin for your liking. You can do this by removing the meatballs, and placing the IP on sauté. Allow sauce to boil in IP with the lid OFF until it thickens to your liking. For a faster method and creating a super thick sauce, remove meatballs, place IP on sauté and add a bit of dissolved cornstarch 1TBSP at a time. Stir constantly until sauce reaches desired thickness.

Step 5: Serve

Return meatballs to IP to coat in sauce. Add salt/pepper/spices to taste. Serve hot over homemade mashed potatoes, pasta, or rice!

Chicken Piccata

If you’re craving some Italian cuisine, but sick of the usual meals with tomato based sauces, then this recipe is for you! Chicken is lightly dredged in cornstarch, browned, and combined with a rich sour cream based sauce. It’s decadent and filling and is sure become one of your family’s favorites!

Ingredients:

  • 2-3 Chicken breasts
  • 16 oz sour cream
  • 2 eggs
  • Shredded Italian Cheese Blend/Mozzarella
  • Cornstarch
  • Lemon Juice
  • Minced Garlic
  • Capers
  • Garlic Powder
  • Ground Sage
  • Salt
  • Black Pepper
  • Dried Basil Flakes
  • Almond Milk (or milk of choice)
  • Butter or Olive Oil
  • Pasta (or ZOODLES!)

DIRECTIONS:

Step 1: Slice chicken into thin strips

Step 2: Dredge chicken in egg/cornstarch

Step 3: Working in small batches, add 1TBSP butter/oilto a skillet and cook dredged chicken until browned and cooked through. Season liberally with salt, pepper, garlic powder, and ground sage.

Step 4: While the chicken is cooking, prepare pasta or zoodles.

Step 5: Combine sour cream and 2 TBSPS butter/oil in a medium saucepan over medium heat, stirring to incorporate. Add lemon juice 1 tablespoon at a time to taste (I like mine fairly lemony!). Add 2TBSPS minced garlic, and 1-2 TBSPS capers. Season with salt, black pepper, and basil flakes to taste. Add almond milk (or mild of choice) to thin sauce to desired consistency. If the sauce is TOO thin, add shredded cheese to thicken.

Step 6: Assemble pasta/zoodles in bowl, top with chicken, sauce, and cheese. Sprinkle additional basil/pepper over top. Serve with lemon wedges.

If you aren’t using zoodles (or even if you are) you could easily add some veggies to this, and I often do! My favorite vegetable add ins are :

  • peas
  • roasted broccoli
  • roasted red peppers
  • grilled/sautéed yellow squash/zucchini

You could also serve this over wild rice – this is a very versatile recipe!

Enjoy!
Riss

Cheesy Pepperoni Pizza Chicken

I love making this cheesy pepperoni pizza chicken for dinner! It’s a little more prep work, but results in a delicious chicken recipe that kids and adults will love. The key to this recipe is using plenty of garlic powder and Italian seasoning, and searing the chicken before finishing the dish off in the oven.

To make this you’ll need….

Ingredients

Fresh chicken breasts (as many as you want to make)

Pepperoni slices (4-8 per chicken breast)

Shredded Italian Cheese Blend or Mozzarella Cheese

Parmesan Cheese Crumbles (the powdery kind, not the slivers)

Provolone Cheese Slices

1-2 cans crushed tomatoes

Garlic Powder

Salt

Pepper

Italian Seasoning

Olive Oil

Directions

Step 1: Butterfly the chicken

You want to use fresh or completely thawed chicken breast, not frozen! If they are large, I recommend cutting them in half, before butterflying. If they are thick, I recommend using a meat mallet or a heavy pan to thin them out, after butterflying.

Step 2: Create layers

To one half of the butterflied breasts, sprinkle salt, pepper, garlic, and Italian seasoning. This will be the “bottom half”. To bottom half, sprinkle on shredded Italian blend or mozzarella cheese. Top cheese with pepperoni slices. Sprinkle on parmesan cheese and additional Italian/mozzarella. Carefully fold over the other half of the chicken breast to create top. To top, sprinkle additional salt, pepper, garlic, and Italian seasoning.

Step 3: Preheat Oven to 350F

Step 4: Sear Chicken

Heat the olive oil in a skillet over medium heat. Once hot, carefully add chicken breasts 1 or 2 at a time to sear. Flip once to sear opposite side. Place seared breasts in a casserole dish.

Step 5: Prepare Chicken for Baking

Once all breasts have been seared and assembled in the casserole dish, pour crushed tomatoes over top the breasts until covered. Liberally sprinkle garlic powder and italian seasoning over top. Sprinkle a moderate amount of salt and pepper over top. Bake at 350 for 30-45 minutes until done, or until a meat thermometer inserted into the thickest breast reads 165F.

Step 6: Broil Cheese Topping

Once the chicken has baked through, add 1 slice of provolone cheese atop each breast and return to oven on BROIL until cheese is bubbly and browned. Remove from oven and serve hot!

Enjoy!
Riss


Bacon Butternut Squash Soup with Goat Cheese Crumbles

Bacon Butternut Squash Soup with Goat Cheese Crumbles

This is one of my absolute favorite soups to make! It’s quintessentially fall. Bacon and goat cheese MAKE this soup what it is! This soup is savory, not sweet, so if you have been shying away from butternut squash soups because they are too sweet for your taste, then THIS is the recipe you need. 🙂

As usual, I skip the process photos and hobknob to dive right into how to make this delicious dinner. Double the recipe if you have a large family or one that eats a lot (or you want leftovers!) – this recipe makes about 8 cups.

Ingredients:

1 med-large Butternut Squash (OR 4-6 cups of frozen cubed butternut squash)

16oz chicken stock or broth

1lb bacon

1/4 to 1/2 cup goat cheese crumbles

1 cups almond milk (or milk of choice)

Approx. 1Tbsp Minced garlic (or garlic powder to taste)

Approx. 1-2 Tbsps Minced ginger ( I use the squeezy kind, fresh would work too)

Approx 1-2tsps. ground sage (to taste)

Salt to taste

Pepper to taste

Directions:

STEP 1: Cook the squash

If you are using FRESH butternut squash:

There are several ways to cook a fresh butternut squash. My favorite way is to halve, de-seed, and roast in the oven at 400F for 40-45 mins, or until fork tender, then scrape out the flesh.

You can also peel and cube the squash first, then boil, microwave, pressure cook, or roast the cubes. I hate peeling the squash so I do it the above way.

If you are using FROZEN cubed butternut squash:

You can boil, roast, microwave, or – my favorite way – pop them in an Instant Pot for 15 minutes.

Regardlessof what method you use, step one is going to be cook the squash until it is tender and the flesh is mashable.

STEP 2: Cook Bacon

While the squash is cooking, cut the pound of bacon into small pieces. I like to use kitchen shears for this – it makes it sooo easy! Cook pieces in a skillet until CRISPY, but not burnt. Reserve a tablespoon of bacon grease to add to the soup (optional).

STEP 3: Puree the squash

Use an immersion blender or a regular countertop blender to puree the squash. Be careful of splatters because the squash will be HOT!

If you are using an immersion blender, add the chicken stock 1 cup at a time and blend until it reaches a thin, smooth, puree. Add garlic and ginger and blend one final time.

If you are using a countertop blender, add a little cooked squash and a little chicken stock to the blender cup and blend in batches until all the squash is pureed. To the last batch, add garlic and ginger.

Return squash puree to a large pot on the stovetop and set heat to medium.

STEP 4: Thin the soup.

Whisk in almond milk (or milk of choice) a little at a time until soup reaches desired consistency. If you need more than 1 cup of milk, switch to water so that the soup doesn’t get too milky. Reduce heat to low if it begins to bubble.

STEP 5: Season, Assemble, and Serve!

Add salt, pepper, and sage to taste. Add additional garlic and ginger as needed. Add bacon (and bacon grease if desired). Add goat cheese. Stir to mix and serve hot!


To add a little extra veggie power to this meal, you can also cook, puree, and blend in:

  • pumpkin
  • acorn squash
  • carrots
  • leeks

I sometimes add a little Shakeology Power Greens too! I also like to serve this soup with cornbread or pumpkin bread. #allthingsfall 🙂

Enjoy!
Riss


Bourbon Chicken Tacos

Chicken breasts are pressure cooked with cola to make tender shredded chicken that is then coated in a sweet bourbon glaze. Paired with spicy salsa and crisp cilantro, these tacos are to die for!

Let me start by saying I have never made these before but I will DEFINITELY be making them again! The crisped shredded chicken tossed in a bourbon glaze is the star of this meal. Honestly I could have just eaten that out of a bowl and skipped the whole “taco” part (the glaze is honestly to die for and would be amazing over porkchops as well)! However, the addition of the spicy salsa and cilantro, all wrapped in a white flour tortilla, made this meal transcendental.

Now, if you know me or have read any of my other “recipes”, you should know that my recipes are more a guide than a set of hard rules and measurements. I’ll approximate the measurements here but please note I did not measure any of the below ingredients while I was actually making this meal. When in doubt, use less, taste, and add more as needed!

I also don’t take process photos. So without further reading and scrolling past a million photos, here is the recipe!


BOURBON CHICKEN TACOS


INGREDIENTS:

  • 2 Large chicken breasts (about 1.5lbs of chicken)
  • 1/4c. applesauce
  • 1c regular cola (i.e Coca-Cola or Pepsi) for chicken, plus 1/4 cup cola for glaze
  • 1/4c chicken stock
  • 1/2 cup brown sugar packed (or 3/4 cup unpacked)
  • 1/4 cup soy sauce
  • 2TBSP rice vinegar (I used garlic flavored rice vinegar)
  • 1TBSP minced ginger
  • 1/2TBSP minced garlic
  • Bourbon of choice, 1-3oz.
  • 2 to 4TBSPS Oil of choice (i.e. coconut, avocado, butter, etc.)
  • White Corn Tortillas (I prefer Mission brand)
  • Mango Habanero Salsa OR Mild Pico de Gallo and fresh Mango
  • Chopped cilantro
  • Cotija Cheese OR Powdered Parmesan

DIRECTIONS:

For the Chicken:

  • Place chicken breasts in Instant Pot with chicken stock, applesauce, and 1 cup of cola.
  • Set to pressure cook high for 20-30 minutes (30 minutes if frozen, 20 minutes if thawed or mostly thawed)
  • Start glaze while chicken is cooking!

When the chicken is done:

  • quick release pressure
  • Shred chicken (tip: use a hand mixer!) and drain, pressing as much liquid out of the shredded chicken as possible.
  • In batches, place chicken into skillet with 1TBSP oil of choice (I used coconut oil, but you could use any oil), and allow to fry until pieces have a slight crisp/crispy edges.

For the Glaze:

  • Add brown sugar, soy sauce, rice vinegar, ginger, garlic, and 1/4cup cola to a sauce pan
  • Bring to a boil, then reduce heat and simmer until reduced to a thick sauce, whisking continuously.
  • When the sauce has thickened add bourbon 1oz at a time to taste. You will likely need to reduce the glaze for a few minutes more if you did not make it thick enough prior to adding the bourbon.
  • Set aside – glaze will continue to thicken as it cools.

ASSEMBLY:

  • Pour glaze over crisped shredded chicken and toss to coat.
  • Steam corn tortillas by wrapping in a damp towel and microwaving for 40 seconds, flipping halfway through (you may need to microwave longer if steaming lots of tortillas at once)
  • Layer chicken onto tortilla, drizzle with Mango Habanero salsa, and top with chopped cilantro and cotija cheese.
  • ENJOY!
Bourbon Chicken Taco on White Corn Tortilla topped with Mango Habanero Salsa, Chopped Cilantro, and Cotija Cheese

Watch the replay of my live cooking video here and follow me on Twitch to catch future cooking livestreams!

xo,

Rissa