Cheesy Pepperoni Pizza Chicken

I love making this cheesy pepperoni pizza chicken for dinner! It’s a little more prep work, but results in a delicious chicken recipe that kids and adults will love. The key to this recipe is using plenty of garlic powder and Italian seasoning, and searing the chicken before finishing the dish off in the oven.

To make this you’ll need….

Ingredients

Fresh chicken breasts (as many as you want to make)

Pepperoni slices (4-8 per chicken breast)

Shredded Italian Cheese Blend or Mozzarella Cheese

Parmesan Cheese Crumbles (the powdery kind, not the slivers)

Provolone Cheese Slices

1-2 cans crushed tomatoes

Garlic Powder

Salt

Pepper

Italian Seasoning

Olive Oil

Directions

Step 1: Butterfly the chicken

You want to use fresh or completely thawed chicken breast, not frozen! If they are large, I recommend cutting them in half, before butterflying. If they are thick, I recommend using a meat mallet or a heavy pan to thin them out, after butterflying.

Step 2: Create layers

To one half of the butterflied breasts, sprinkle salt, pepper, garlic, and Italian seasoning. This will be the “bottom half”. To bottom half, sprinkle on shredded Italian blend or mozzarella cheese. Top cheese with pepperoni slices. Sprinkle on parmesan cheese and additional Italian/mozzarella. Carefully fold over the other half of the chicken breast to create top. To top, sprinkle additional salt, pepper, garlic, and Italian seasoning.

Step 3: Preheat Oven to 350F

Step 4: Sear Chicken

Heat the olive oil in a skillet over medium heat. Once hot, carefully add chicken breasts 1 or 2 at a time to sear. Flip once to sear opposite side. Place seared breasts in a casserole dish.

Step 5: Prepare Chicken for Baking

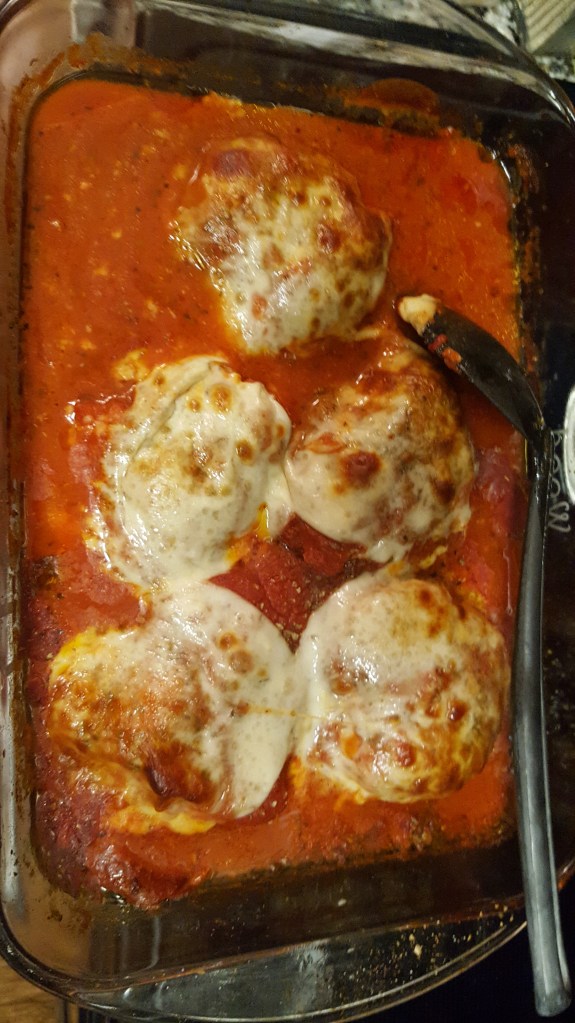
Once all breasts have been seared and assembled in the casserole dish, pour crushed tomatoes over top the breasts until covered. Liberally sprinkle garlic powder and italian seasoning over top. Sprinkle a moderate amount of salt and pepper over top. Bake at 350 for 30-45 minutes until done, or until a meat thermometer inserted into the thickest breast reads 165F.

Step 6: Broil Cheese Topping

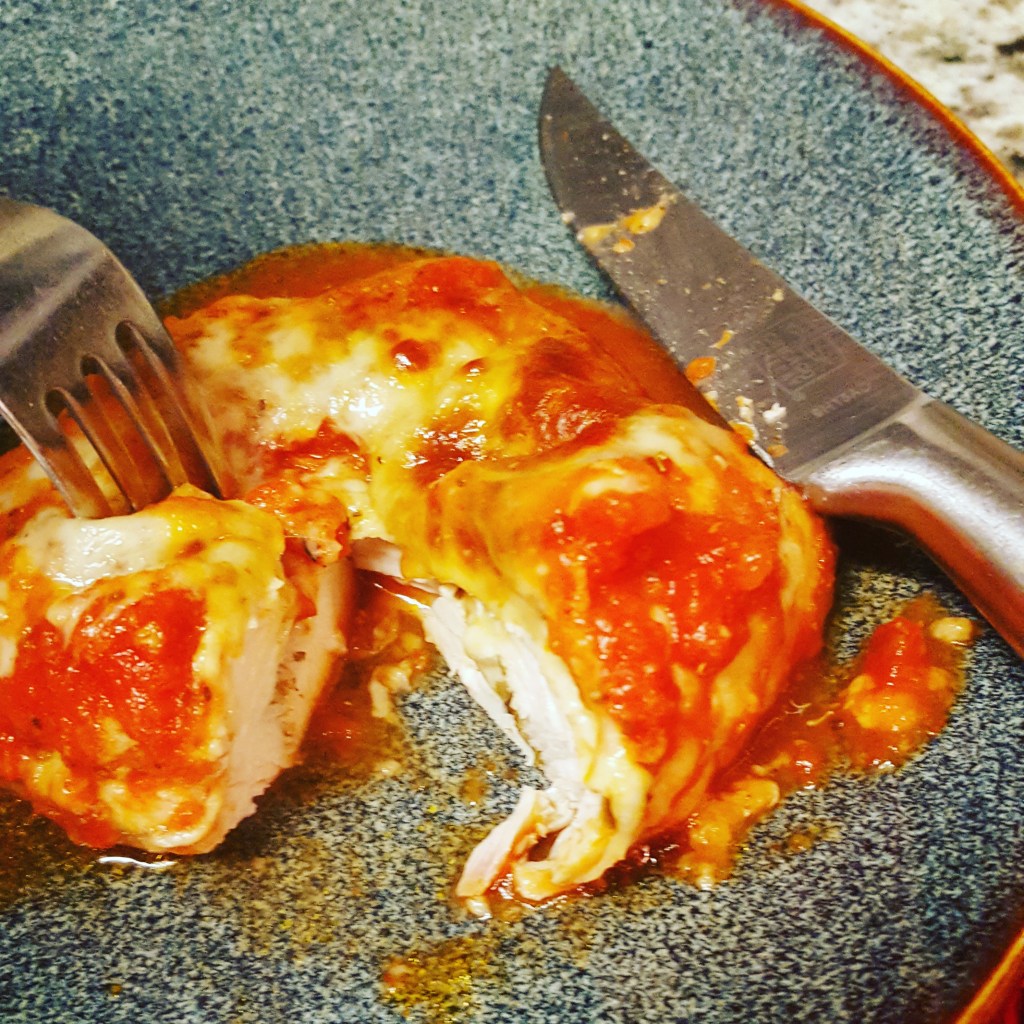
Once the chicken has baked through, add 1 slice of provolone cheese atop each breast and return to oven on BROIL until cheese is bubbly and browned. Remove from oven and serve hot!

Enjoy!
Riss


Easy Lemon Cake Pops

Cake pops have to be the most versatile dessert ever. You can decorate them and flavor them a million different ways. You can leave out the sticks and turn them into “cake truffles” or “cake balls”. They are ready-to-eat in perfectly portioned sphericals and darn it if they just don’t make everyone happy!

I LOVE cake pops. I don’t have all the fancy cake pop makin’ gadgetry – just do a search for cake pop molds on Amazon and you’ll find all kinds of goodies to make your cake pop making experience much more “professional” and supposedly easier too. But I don’t use any of that stuff. Would I like to? Yes. But I don’t really have the space to store said stuff and I really really don’t need any more excuses to make cake pops more often.

If you want to use the gadgetry, by all means, go right ahead! But if you don’t have the fancy tools, you CAN still make yummy cake pops fairly easily! We made these lemon cake pops for summer solstice this year and 5 days later they were all gone!

WHAT YOU’LL NEED

  • yellow cake mix plus ingredients on box (eggs, oil, water)
  • LorAnn lemon oil
  • 16oz yellow candy coating (vanilla flavored) – like these
  • vanilla buttercream icing
  • cooking spray/oil

TOOLS

  • 9×12 baking dish
  • large mixing bowl
  • hand mixer
  • rubber spatula
  • cookie sheet
  • wax paper/freezer paper
  • double boiler, or 1 medium pot and 1 small pot
  • cake pop sticks – i.e. paper straws, bamboo skewers, etc.
  • cake pop stand (commercial or DIY)

INSTRUCTIONS

  • Prepare cake batter as instructed and add 1 vial of LorAnn lemon oil to batter. Bake as directed. Be sure to coat your baking pan with oil/cooking spray!!
  • Allow cake to cool completely then turn out in pieces into the mixing bowl
  • Mix in icing 1 spoonful at a time until cake is able to be formed into balls. You want the consistency of the resulting “dough” to be moist enough that the cake balls do not fall apart. If you add too much icing, the balls will too soft to stand upright on the sticks – so just ditch ’em! The cake balls will still taste yummy, they’ll just be a bit softer in the middle. 😉
  • Form the “dough” into 1 inch balls, insert sticks, and place on cookie sheet covered with wax or freezer paper. Freeze for 1-2 hours.
  • When the cake balls have frozen and are firm, assemble the double boiler (or use the 2 pot method).
  • Melt candy coating in the double boiler/top pot, over medium heat, stirring constantly to avoid burning/seizing.
  • Carefully dip each cake pop into the melted coating. Either return the dipped cake pop in a standing position to the wax paper (you will have a flattened “top”) or place pop in a stand. (Tip: Sytrofoam lids, cardboard boxes, and some colanders make easy impromptu stands.)
  • Place finished cake pops in the refrigerator and allow coating to cool completely.
  • Eat and Enjoy!

This is a pretty basic recipe. Experiment with different cake flavors and icing combos and add sprinkles or an icing drizzle or even fondant flourishes to make your own special cake pops!

And don’t stress if they don’t turn out perfectly – several of ours had some less than perfect candy coating (I let hubby and the kids dip them), it’s whatever. I don’t claim to be a “Pinteretst perfect” mom, so what you see in our pics is never a doctored up reality 😉 IMO, it’s the experience and memory-making that matters.

XO,
Marissa