Easy Dinner Recipes: “Philly Cheesesteak” Bowls

Life has been extra crazy lately, and I’m not talking about the current COVID-19 Pandemic and the prolonged social distancing the US is facing right now. That’s crazy too, but since my husband and I both work from home already, and we homeschool, our day to day routines haven’t been too affected – other than not being able to attend social functions and keeping our daughter home from dance classes and playgroups.

No, my life is crazy because I am:

  • in the middle of a complete re-brand and moving over to an all new, professionally designed, website
  • developing an online course, for Pinterest management using Tailwind, under the new brand
  • working with a therapist in an RDI program for my daughter’s newly diagnosed Autism and implementing this at home
  • pushing through several MAJOR home renovations in preparation for listing our house for sale
  • planning a BIG 800 mile move

You know, all on top of managing the day to day work for my clients’ Pinterest accounts, living with chronic illness and navigating the “bad days” , homeschooling, and running a home. NBD, right?

All that to say, I really really really appreciate a meal that doesn’t require me to put a whole lot of effort into it. If it can be made in 30 minutes or less, it’s a keeper! Bonus points for being low carb.

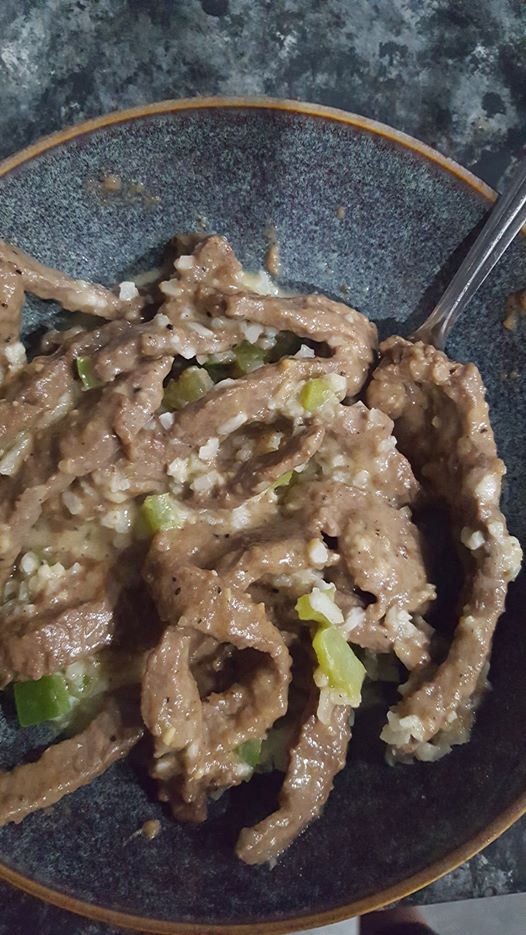
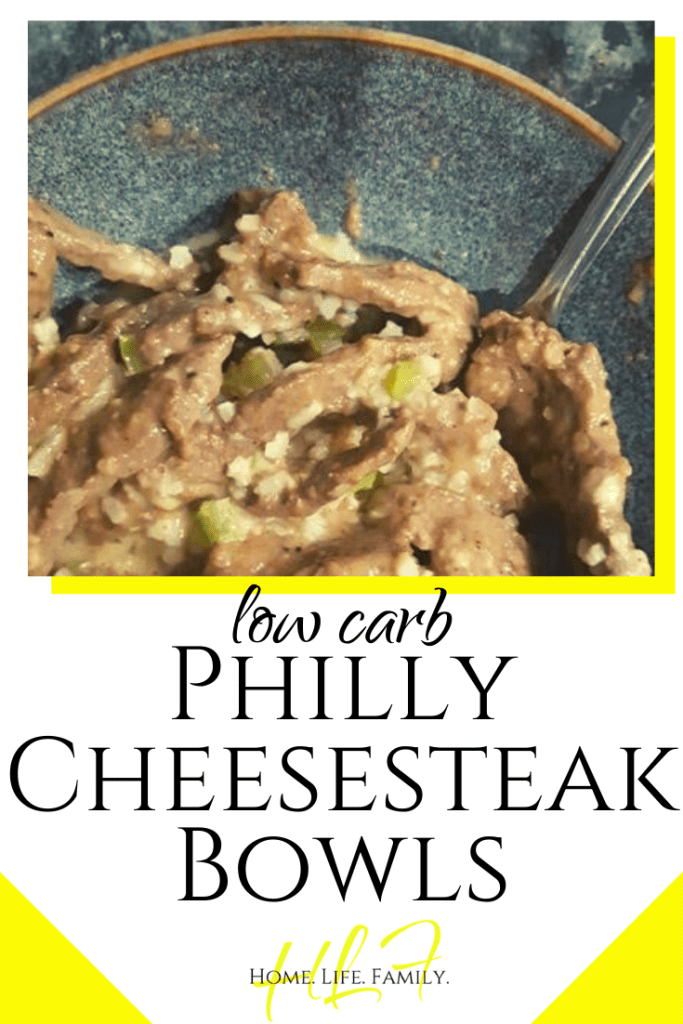
These Philly Cheesesteak bowls check all the boxes! Plus, you only need 4 main ingredients, and some common seasonings.

I’ll remind you that you won’t see much by way of measurements in my recipes. I cook intuitively – which means I wait for the spirit of my ancestors to tell me I’ve used enough seasonings!

Really, I taste as I go and adjust accordingly. I recommend you do too. Just remember you can always add MORE of something, but you can’t take it back! So start with a little and add a little more at a time as needed.

Without further ado… Philly Cheesesteak Bowls!


Ingredients:

  • THIN sirloin steaks OR Shredded Steak (4-6 thin steaks, they came in packs of 3 from my grocery store, or 2 packs of shredded steak)
  • 2 Green Bell Peppers
  • Bag of Frozen Cauliflower Rice
  • Shredded Mozzarella (I used about 4 handfuls, so maybe 2 cups?)
  • Milk or non-dairy milk of choice (we use unsweetened Almond milk)
  • McCormick’s Montreal Steak seasoning (or steak rub/seasoning of choice)
  • Worcestershire sauce
  • Soy Sauce
  • Salt
  • Black Pepper
  • Oil (olive, coconut, canola, whatever)

INSTRUCTIONS:

  • If using thin sirloin steaks, cut steaks into narrow strips.
  • Dice peppers.
  • Place meat into skillet and brown, stirring frequently.
  • Season meat liberally with Montreal steak seasoning (or seasoning of choice) and cook through.
  • Add roughly equal parts Worcestershire sauce and soy sauce – Listen to your ancestors! Or, add a little at a time until it tastes good. You want there to be enough liquid to form a sauce once the cheese is melted in.
  • Melt in 2 handfuls of mozzarella cheese.
  • In a small skillet, saute peppers in oil of choice until softened (about 3 to 5 minutes)
  • Microwave frozen cauliflower rice for 5 minutes.
  • Add cauliflower rice to peppers and season with salt/black pepper.
  • Add a little milk to veggies and melt in 2 handfuls mozzarella cheese. Add more milk as needed.

    Serve combined or over plain rice if you aren’t worried about the carbs!


You could probably do this all in the same skillet but, if you have kiddos who aren’t likely to eat the cauli rice/pepper mixture, like I do, using two skillets allows everyone to layer their own bowl however they want to.

Enjoy!

xo,

Marissa

SOOOOOO DELICIOUS!!!

Easy Lemon Cake Pops

Cake pops have to be the most versatile dessert ever. You can decorate them and flavor them a million different ways. You can leave out the sticks and turn them into “cake truffles” or “cake balls”. They are ready-to-eat in perfectly portioned sphericals and darn it if they just don’t make everyone happy!

I LOVE cake pops. I don’t have all the fancy cake pop makin’ gadgetry – just do a search for cake pop molds on Amazon and you’ll find all kinds of goodies to make your cake pop making experience much more “professional” and supposedly easier too. But I don’t use any of that stuff. Would I like to? Yes. But I don’t really have the space to store said stuff and I really really don’t need any more excuses to make cake pops more often.

If you want to use the gadgetry, by all means, go right ahead! But if you don’t have the fancy tools, you CAN still make yummy cake pops fairly easily! We made these lemon cake pops for summer solstice this year and 5 days later they were all gone!

WHAT YOU’LL NEED

  • yellow cake mix plus ingredients on box (eggs, oil, water)
  • LorAnn lemon oil
  • 16oz yellow candy coating (vanilla flavored) – like these
  • vanilla buttercream icing
  • cooking spray/oil

TOOLS

  • 9×12 baking dish
  • large mixing bowl
  • hand mixer
  • rubber spatula
  • cookie sheet
  • wax paper/freezer paper
  • double boiler, or 1 medium pot and 1 small pot
  • cake pop sticks – i.e. paper straws, bamboo skewers, etc.
  • cake pop stand (commercial or DIY)

INSTRUCTIONS

  • Prepare cake batter as instructed and add 1 vial of LorAnn lemon oil to batter. Bake as directed. Be sure to coat your baking pan with oil/cooking spray!!
  • Allow cake to cool completely then turn out in pieces into the mixing bowl
  • Mix in icing 1 spoonful at a time until cake is able to be formed into balls. You want the consistency of the resulting “dough” to be moist enough that the cake balls do not fall apart. If you add too much icing, the balls will too soft to stand upright on the sticks – so just ditch ’em! The cake balls will still taste yummy, they’ll just be a bit softer in the middle. 😉
  • Form the “dough” into 1 inch balls, insert sticks, and place on cookie sheet covered with wax or freezer paper. Freeze for 1-2 hours.
  • When the cake balls have frozen and are firm, assemble the double boiler (or use the 2 pot method).
  • Melt candy coating in the double boiler/top pot, over medium heat, stirring constantly to avoid burning/seizing.
  • Carefully dip each cake pop into the melted coating. Either return the dipped cake pop in a standing position to the wax paper (you will have a flattened “top”) or place pop in a stand. (Tip: Sytrofoam lids, cardboard boxes, and some colanders make easy impromptu stands.)
  • Place finished cake pops in the refrigerator and allow coating to cool completely.
  • Eat and Enjoy!

This is a pretty basic recipe. Experiment with different cake flavors and icing combos and add sprinkles or an icing drizzle or even fondant flourishes to make your own special cake pops!

And don’t stress if they don’t turn out perfectly – several of ours had some less than perfect candy coating (I let hubby and the kids dip them), it’s whatever. I don’t claim to be a “Pinteretst perfect” mom, so what you see in our pics is never a doctored up reality 😉 IMO, it’s the experience and memory-making that matters.

XO,
Marissa